What is UPI? Understand UPI App Quickly
UPI full form is Unified Payment Interface and it is a phone based payment app to transfer funds instantly from one's bank account. Using UPI app one can transfer money from/to directly from their bank accounts and does not require to keep money in e-wallet (where it does not earn any interest).
What is needed to start using UPI App
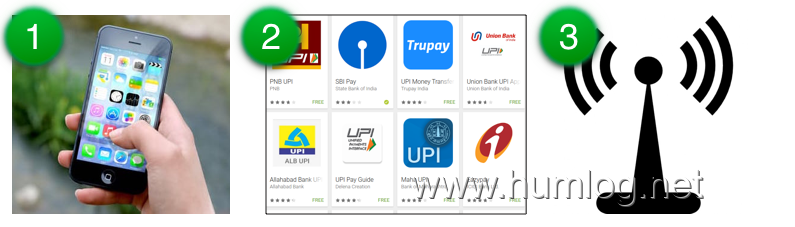
To be able to use UPI, you need a smartphone, a UPI Mobile App and internet enabled on your phone.
Steps involved to start using UPI-
Install a UPI App - Open 'Play Store' from your Mobile and type 'UPI App' in search bar. A list of all UPI Apps provided by Banks will be displayed. Select the App that you want to install/use and Install it. For example, we have installed SBI Pay UPI App. On Dec 30, 2016, India Govt has also launched govt sponsored BHIM UPI app
Register Yourself on UPI - After installation, you need to register yourself on UPI to start paying or receiving money. Please understand that the core of UPI is a mobile number registered with bank. Without registered mobile number you cannot register for UPI. Many people are getting errors in registration as the mobile number they are trying to register with is not registered with their bank.
Prerequisites for Registration in UPI App
-
Ensure that your mobile number is registered with your bank.
-
If you already have an account and you have not linked your mobile number with your bank account, then:
-
You can visit your nearest bank branch and register your mobile number.
-
Or you can go to any ATM, give your bank account card (debit, credit, etc.) and choose the option to register your mobile number.
-
-
If you are using dual SIM mobile device then make sure you choose the SIM and number which is registered with your Bank Account otherwise you will get 'SMS Authentication Failure'. Usually in Dual SIM phones, the default Sim is Sim 1. Change the default SIM settings, if your registered number with bank is SIM 2.
UPI App - Registration
You will need to perform the following steps only once.
(The steps order may change depending on which UPI App you are using)
Step 1: Mobile number verification
Once you install the app, it will automatically capture your mobile number. The application will automatically send an SMS
from your phone. Before clicking OK, ensure that you have enough balance to let the app send an sms.
Step 2: Enter Personal Details
Enter your details (as asked. Eg: Name, Date of Birth
(DOB), Email Id, etc.)
Some Apps may give multiple options like Facebook or Gmail Login. Accordingly enter details and click on ‘Submit’
Set Security Question
Select security questions among the ones given in drop down menu. Give answers for questions you select.
(Remember or note down these answers. As these security questions are used at the time of password reset.)
Set App Login Password to access the UPI Application later. (Remember password to login next time.)
Step 3: UPI ID / Virtual ID Creation
You can choose any string as your virtual address. You may choose your Unique ID (Aadhar No., Mobile No., Email) as your Virtual Payment Address (VPA). VPA typically looks like an email address - 'mohan@SBI' or '9654233896@HDFC' If a VPA is already used (App will notify), you need to create a different one. To transfer funds or collect money, you may share your VPA to others. It is your unique ID.
Click here to know more about upi virtual payment address. Please remember that ICICI bank uses the term UPI ID instead of VPA.
Step 4: Add Bank Accounts
-
Select Your Bank from the drop down. All accounts linked to your mobile number will be visible. Select the Account you wish to link.
-
Give Account Details For First Time.
-
Set the Limit (Maximum possible transfer amount) of the VPA (this feature not available in all UPI Apps)
Step 5: Set M-Pin for Validating Transactions
MPIN is the mobile PIN you typically set for mobile banking registration. If you already have a MPIN set then no need to go through this step.
-
Enter last 6-digit of the Debit Card Number (linked to the account)
-
Enter Month and Year of Expiry
-
An OTP will be generated and sent to the registered Mobile Number. Enter and submit it.
-
MPIN is set successfully. MPIN will be asked for authorising transactions everytime.
UPI App - Frequently Asked Questions (FAQs)
What if I have multiple mobile numbers linked to multiple bank accounts? Can I add those bank accounts in one UPI App?
Ans No. You would need multiple UPI Apps - one App for each mobile number.
What if I change my mobile number? UPI App will still work?
Ans No. If you change your mobile number, you will need to re-register with UPI and create a new VPA / Virtual ID / UPI Id.
I am getting "SMS Authentication Failure". Why?
Ans It may be due to your mobile number not registerd with bank. Or if you are using a dual Sim phone, your default SIM is not the one registered with bank. Try changing the default SIM.
How can I transfer money within my own bank accounts - from my one bank account to my another account?
Ans Some UPI Apps (for eg. Axis Pay) allow you to create separate VPA / Virtual IDs/ UPI IDs for separate bank accounts. This is a good feature as then you can transfer money within your own bank accounts easily.
If you cannot create multiple VPAs / Virtual IDs/ UPI IDs in your UPI App then you need to install another UPI App for your another bank account for the purpose of funds transfer.
Category: finance upi